Nested ESXi installation using HTTPS boot over…

Nested ESXi installation using HTTPS boot over…

In vSphere 7.0 Update 2, an enhancement was made to the Virtual Machine’s UEFI firmware called VirtualEFI that would enable ESXi to run in a VM (Nested ESXi) and perform an HTTP Boot given the ESXi bootloader URL without requiring any traditional PXE infrastructure. This was especially useful […]


VMware Social Media Advocacy

Continue Reading

Optimize Windows 7 Guest Operating System Performance for VMware

These recommendations include turning off the screen saver and not specifying a sleep timer. Your organization might require the use of screen savers. For example, you might have a GPO-managed security policy that locks a desktop a certain time after the screen saver starts. In this case, use a blank screen saver.

Prerequisites

Prepare a guest operating system for desktop deployment.

First Procedures:

Disable any unused ports, such as COM1, COM2, and LPT.

Adjust display properties.

a
Choose a basic theme.
b

Set the background to a solid color.

c

Set the screen saver to None.

d
Verify that hardware acceleration is enabled.

Select a high-performance power option and do not specify a sleep timer.

Disable the Indexing Service component.

Note

Indexing improves searches by cataloging files. Do not disable this feature for users that search often.

Remove or minimize System Restore points.

Turn off system protection on C:\.

Disable any unnecessary services.

Set the sound scheme to No Sounds.

Set visual effects to Adjust for best performance.

Open Windows Media Player and use the default settings.

Turn off automatic computer maintenance.

Adjust performance settings for best performance.

Delete any hidden uninstall folders in C:\Windows, such $NtUninstallKB893756$.

Delete all event logs.

Run Disk Cleanup to remove temporary files, empty the Recycle Bin, and remove system files and other items that are no longer needed.

Run Disk Defragmenter to rearrange fragmented data.


Next Procedure

1

Uninstall Tablet PC Components, unless this feature is needed.

2

Disable IPv6, unless it is needed.

3

Use the File System Utility (fsutil) command to disable the setting that keeps track of the last time a file was accessed.

For example: fsutil behavior set disablelastaccess 1

4

Start the Registry Editor (regedit.exe) and change the TimeOutValue REG_DWORD inHKEY_LOCAL_MACHINE\SYSTEM\CurrentControlSet\services\Disk to 0x000000be(190).

5

Shut down the guest operating system and power off the virtual machine.

6

Change the virtual machine video card RAM setting to 128 MB.

7
Power on the virtual machine.


Thank you to:  pubs.vmware.com for this information.

Continue Reading

To the root of TinyLinux

I have a VM that I use for testing that has TinyLinux installed on it.  It works great, but when I typed in ‘su’ it would ask me for a password which i didn’t set.

After doing some hunting, I found out that typing ‘sudo su’ in terminal window gets you root access.  From what a co-worker told me, this is an old school function that is rarely/never used.

Continue Reading

Disable Search Indexing In Windows 7

In order to speed up the search process, the search indexing service scans through the files and folders on the Windows system and records information about them in an index file. But it also consumes some resources of the system, so for the users with a slow computer it is beneficial to turn off search indexing. Go through the following simple steps to disable search indexing.

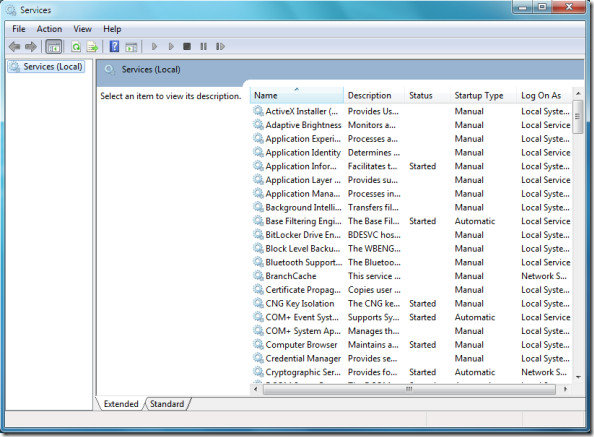
First of all click Start, type services.msc and press Enter.
1


This will open Services dialogue box.
2


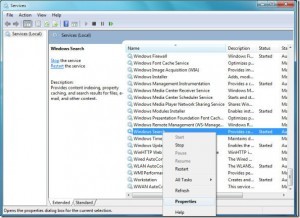
Now locate the Windows Search service in the list of services, right click it and choose  Properties.

3


In the startup type drop down box, choose the Disabled option.
4


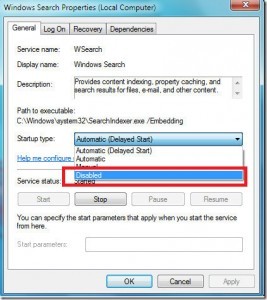
Click the Apply button, reboot your computer and that’s it, Search Indexing has been disabled. Enjoy!

Continue Reading